Laptop Schematics

Laptop Schematics Diagram

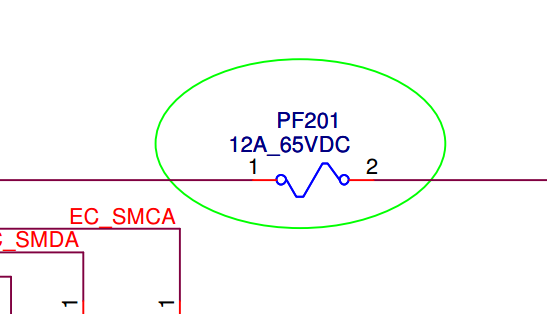
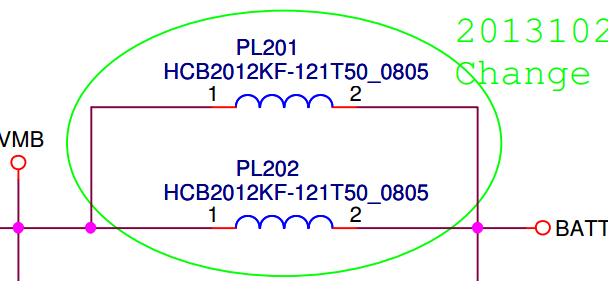
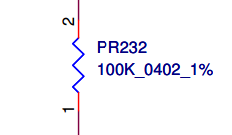
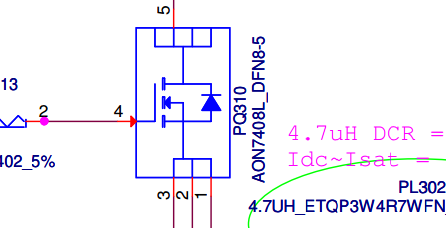
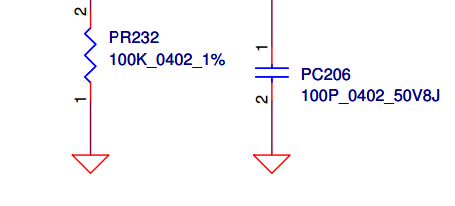
The laptop schematics diagram is used to help troubleshoot and repair the laptop’s motherboard, as well as to identify the connections between the components, detect the parts themselves, detect the voltage points, frequency points and in general to find the various defects in the laptop. .

Laptop schematic

To download a schematic of laptops, you can refer to the parts of each laptop’s brand. You can also search for the desired laptop scanner in the site search. If you do not have the support for the laptop bios support, send your application to get it as soon as possible and if possible. When downloading a schematic of the laptop you want, in addition to the model and brand of your laptop, the motherboard number Check out the error in downloading. The laptop’s motherboard number is placed on most motherboards on most laptops and the laptop must be fully open so you can read the motherboard number. On each page, complete information about the file. Which includes the following:

  • Model
  • MOdel NO
  • Model Name
  • CPU
  • Chipset
  • PCB NO
  • Project Code
  • BOM P.N
  • Rev
  • Total Page
  • North Bridge
  • South Bridge

Schematic reading

[aparat id=”rl6Wu”]

The Schematic Diagram of the laptop are divided into different blocks based on the performance of each section. On the second page, a general diagram of the laptops is visible, showing the various blocks as well as how they are connected and the block number numbers in the map. You can also see voltage nodes in a laptop schematics. Voltage arrays are actually single-base schematic symbols that we can determine the specific voltage level of a point or piece. For example All the nodes connected to the GND node have a voltage of zero. The voltages in the schematic of a laptop with the same name are connected even if directly to the thirty

Parts marks on laptop schematics

Fuse:

In the figure below, you can see the fuse with the address PF201, which means p means the power part of the device and f also refers to Fuse. The number 201 is the address of the part on the board. Also, this fuse has 12 amps of allowable current and 65 volts DC voltage is allowed.

Fuse Laptop Schematics

Capacitor:

In the figure below, you can see the capacitor with the address PC201, where p means the power part of the device and C also refers to Capacitor meaning capacitor. The number 201 is the address of the part on the board. The number 1000P indicates the capacitance, which here is 1000 picofarads. The number 0402 is the size of the capacitor. 50V indicates the working voltage of the capacitor and 7K indicates the tolerance of the capacitor

Capacitor Laptop Schematics

.

Inductor:

See the inductor in the figure below with the address PL201, where P means this inductor is related to the power part of the device, and the specifications of the inductor are given below. And the number 0805 at the end also indicates the size of the piece

Inductor Laptop Schematics

Resistance:

In the figure below, you can see the resistor, whose address indicates that this resistor is located in the power supply. The value of this resistor is 100 kg ohm with size 0402 and tolerance of 1%

.

Resistance Laptop Schematics

MOSFET:

In the figure below, you can see the N-Channel MOSFET transistor (if the arrow is out, it is N-Channel, and if it is in, it is P-Channel)

Mosfet Laptop Schematics

Grand Sign

The shape of the triangle you see shows the grand or negative of the feed

Grand Sign Laptop Schematics

The following symbol also indicates that the continuation of this circuit is on page 33.

علامت ادامه در شماتیک لپ تاپ